How to Use a Refrigerant Recovery Machine? – Secret Revealed by Expert
We know how important it has become in today’s world to recover refrigerants from the various cooling devices used in your home. There are more and more laws coming up about this and soon it is going to be pretty commonplace to see people recovering their refrigerants. However, if you don’t know how to use a refrigerant recovery machine, things might get tough for you as the time passes.
In this article, we are telling you the top secrets in using a refrigerant recovery machine. Once you’re done with this article, we know you won’t be able to stop yourself from testing out your knowledge. Happy learning!
Refrigerant recovery machine can be used from lighter & ready-to-go machines to complex of systems that take some efforts to go with the flow. Today’s refrigerant recovery machines are even more environment-friendly, since they use oil-less compressors which have so many advantages over the traditional compressors, including- faster recovery rates, better recovery of refrigerant, no more oil-related maintenance, and best of all, the ability to recover more than one refrigerant without cleaning.
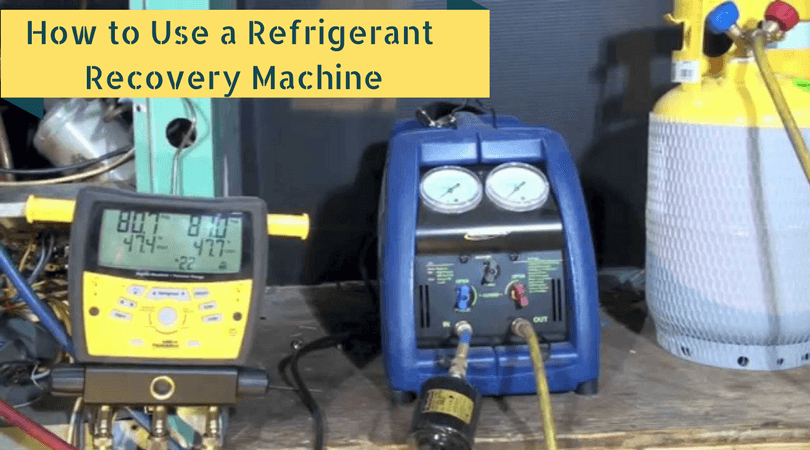
Here is the list of equipment you need to recover refrigerant from a your HVAC device:
- HVAC gauges
- Recovery machine
- Recovery tank
How to Use a Refrigerant Recovery Machine?
1) Understand what you will be doing
Before you get started with how to use a refrigerant recovery machine, you should be aware of the kind of refrigerant that is used in your devices and whether or not you want to put back the refrigerant in the same device. You should also read up about what each piece of equipment does when you are recovering refrigerant.
2) Ensure that no dirt enters the tank
When you are recovering refrigerant, your machine may be exposed to dirt and dust that have been collecting in your device since a long time. These dirt could also include small pieces of metals or any acid contamination that might have happened. To prevent any dirt from entering the tank (and potentially reducing its lifeline) make sure to use an inline filter at the inlet port.
3) Recover the refrigerant
Recover the liquid refrigerant first followed by the vapor refrigerant. Use methods like push-pull method to get the refrigerant out of your device.
Now that you know everything you should take care of while recovering refrigerant, here are the steps to follow so that you can become a pro.
How to recover refrigerant?
Step 1: Turn off the gauges and make sure you properly connect the high side and the low side of the device where the refrigerant should be recovered from. If you are not sure about the high and low sides, here’s a quick tip- red hose goes to the high side, blue hose goes to the low side. The yellow hose is attached to the suction line of the recovery machine. The line will be marked as “IN” so you don’t face any issues.
Step 2: Connect one hose from the recovery machine to the recovery tank. Before you start recovering the refrigerant, place your recovery tank on a scale and note the weight so you are aware of how much refrigerant you are pulling out of the device. Do not overfill the recovery tank, according to today’s laws, filling more than 80% of your recovery tank is not allowed.
Step 3: Remove the air from the hoses by opening the required valves from the device to the refrigerant recovery machine. However, keep the valve from the refrigerant recovery unit to the tank connected. At the tank side of the connection, slightly unscrew the valve till you can hear the air escaping. The above step should be done only for a few seconds, after which you should tighten the valve once more. This will keep the refrigerant under pressure and all the air will leave. Slowly you will see the pressure going down in the machine.
Step 4: Reconnect all the valves and turn on the refrigerant recovery machine. You will see a reduction in the pressure as the refrigerant is being pulled into the machine. Keep the device on until it reaches 0 psi on the low side of the recovery machine. Going below psi is dangerous because in case of any leak, the machine will just be sucking air.
Step 5: Once the machine has reached 0 psi, it will shut off. Then turn the blue valve and the red valve to ‘purge’ on the recovery unit. The gauges will tell you if this step is performed correctly. The low side will go from high to low, and the machine will turn itself off after it is done. After shutdown, close all the valves, specially the one connecting to the refrigerant recovery tank.
Remember never to mix refrigerants, specially if you want them to go back into the device after recovery. Keeping all these secrets and steps in mind, we are sure you can’t to go out and demonstrate how to recover refrigerant like a pro!